Before sitebrunch can count conversions, you decide what counts. This article shows you how to create events and which of them are goals.
Last updated: October 4, 2026
Requirements
The snippet is installed on your website.
Your workspace has at least the Starter plan.
Goals and interactions
sitebrunch counts events, meaning anything that happens on your website and matters to you: a click on “Subscribe to newsletter”, a download, a purchase. Every event is either a goal or an interaction.
A goal is what a visit should achieve, for example a purchase or an inquiry. In the analysis you see goals with revenue and source.
All other events are interactions. You simply count them, completely independent of your goals. For example, how often the video on the home page is started or how often someone downloads the price list. You can also use interactions as steps in funnels.
Manage events
In the menu under “User Experience”, click “Conversions”. At the bottom left under “Setup” you find “Manage events”. Here you see all events, split into goals and interactions, and how often they were triggered in the selected period.
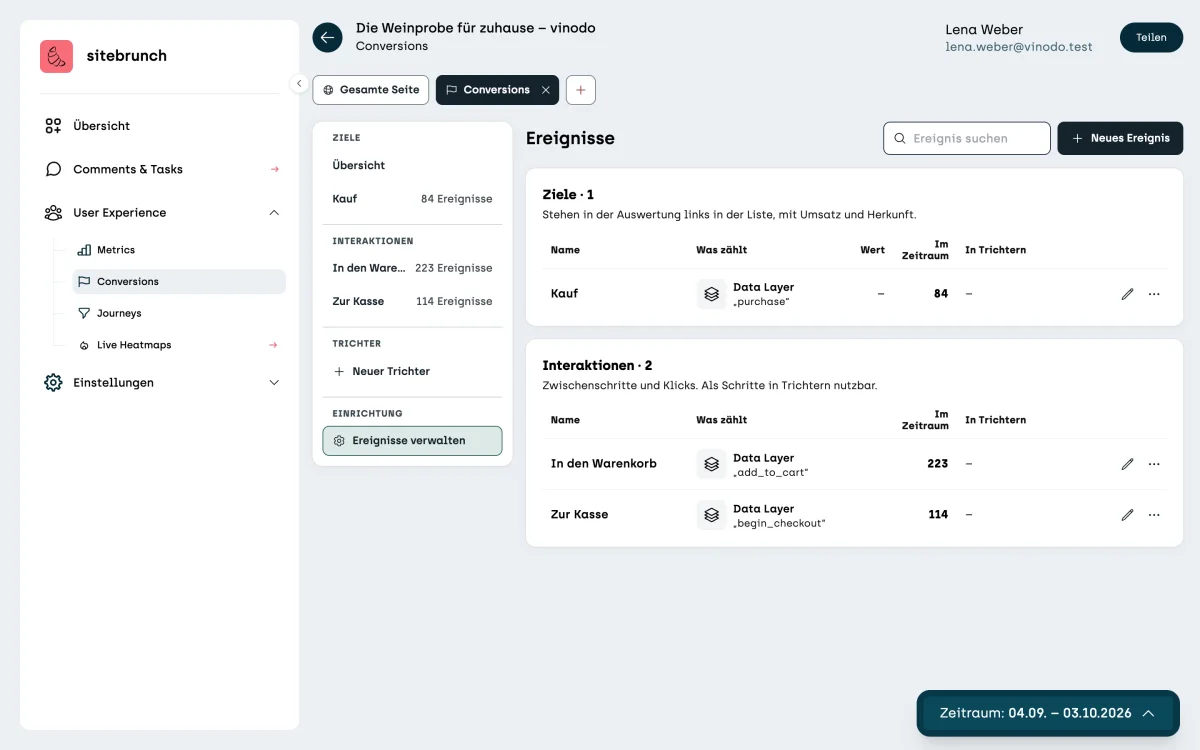
Use the menu with the three dots to turn an interaction into a goal, open it in the analysis or delete it.
Create a new event
Click “New event” at the top right. Give the event a name you will recognize later, and under “What counts?” pick one of four kinds. Which one fits depends on how the event can be recognized on your website.
Page visited
Use this kind when the event has its own page. A typical example is the thank-you page after an inquiry or an order.
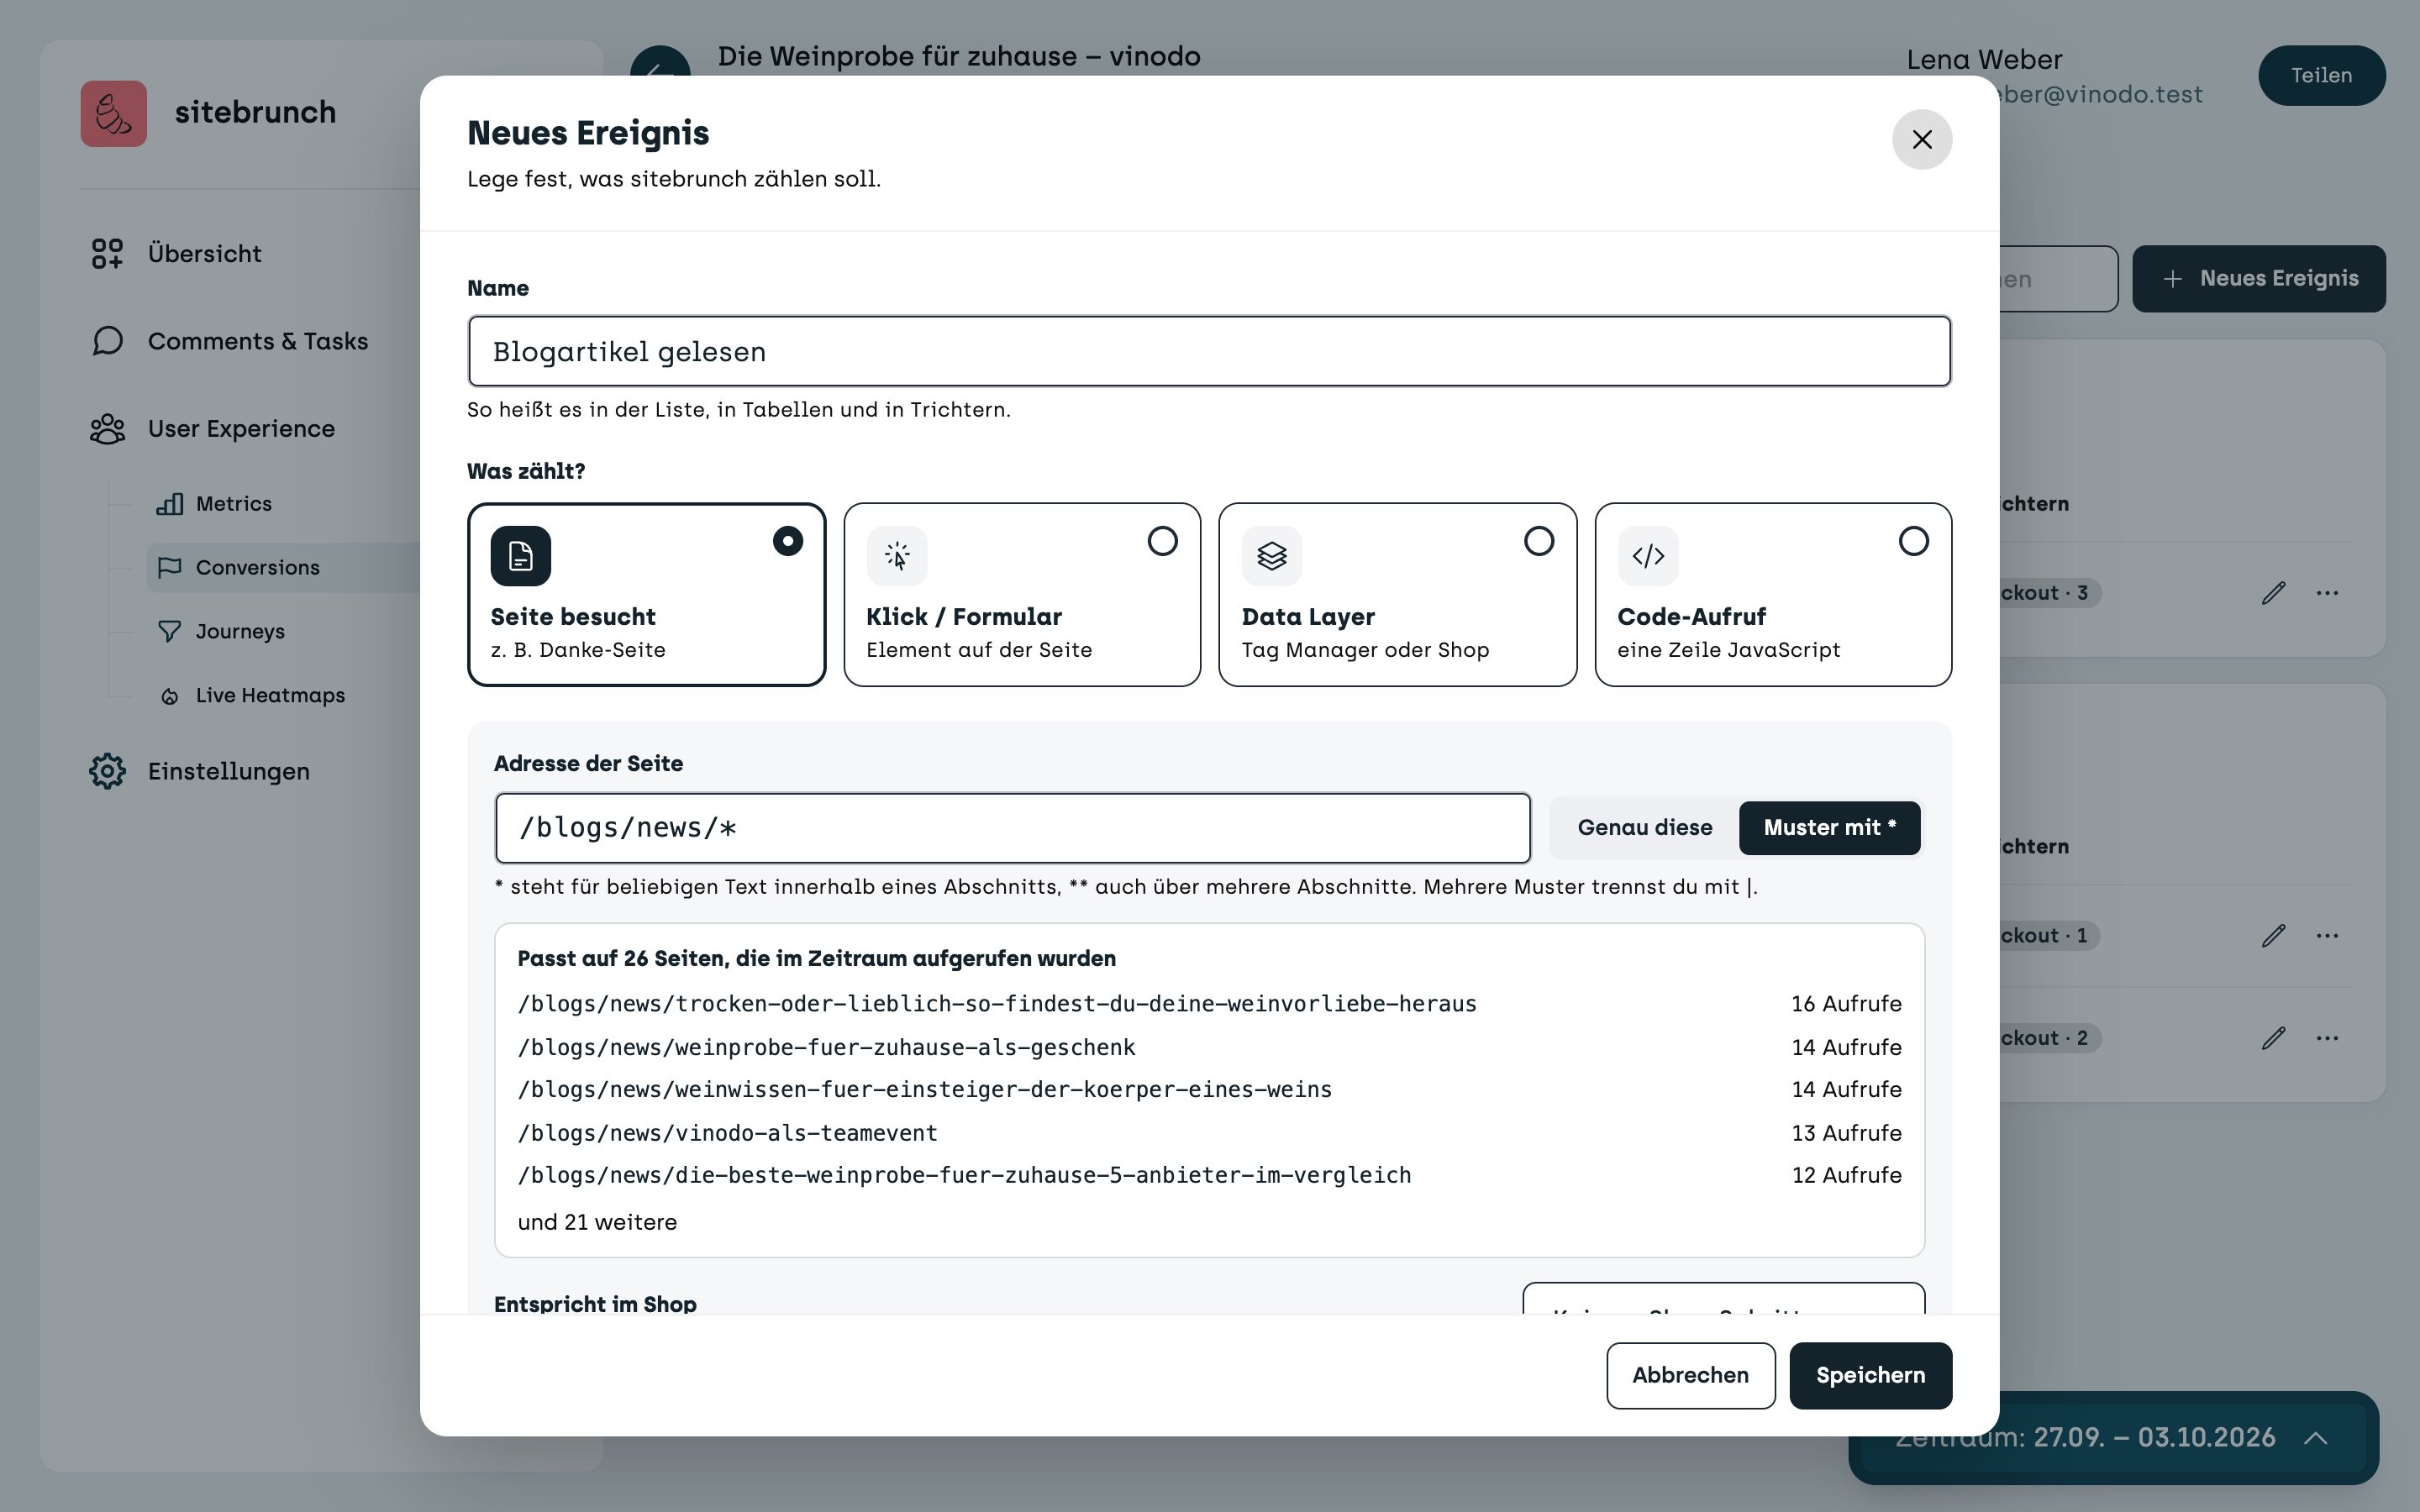
Enter the path under “Page address”. With “Exactly this”, only this one address counts. With “Pattern with *”, all matching pages count, and * stands for any text.
Example on vinodo.de: The event “Blog article read” with the pattern /blogs/news/* counts every view of a blog article. Right below, sitebrunch shows you which pages the pattern matches, here 26 blog articles.
Click / form
Use this kind for a click on a specific element or for submitting a form. You don't need any code for this. You pick the element directly on your website.
For this you need the sitebrunch extension for Chrome. If it is not installed yet, sitebrunch asks you about it the first time and takes you to the installation with “Go to extension store”.
First give the event a name and choose under “Counted on” whether a “Click” or a “Form submit” counts. Then click “Pick an element on the page”.
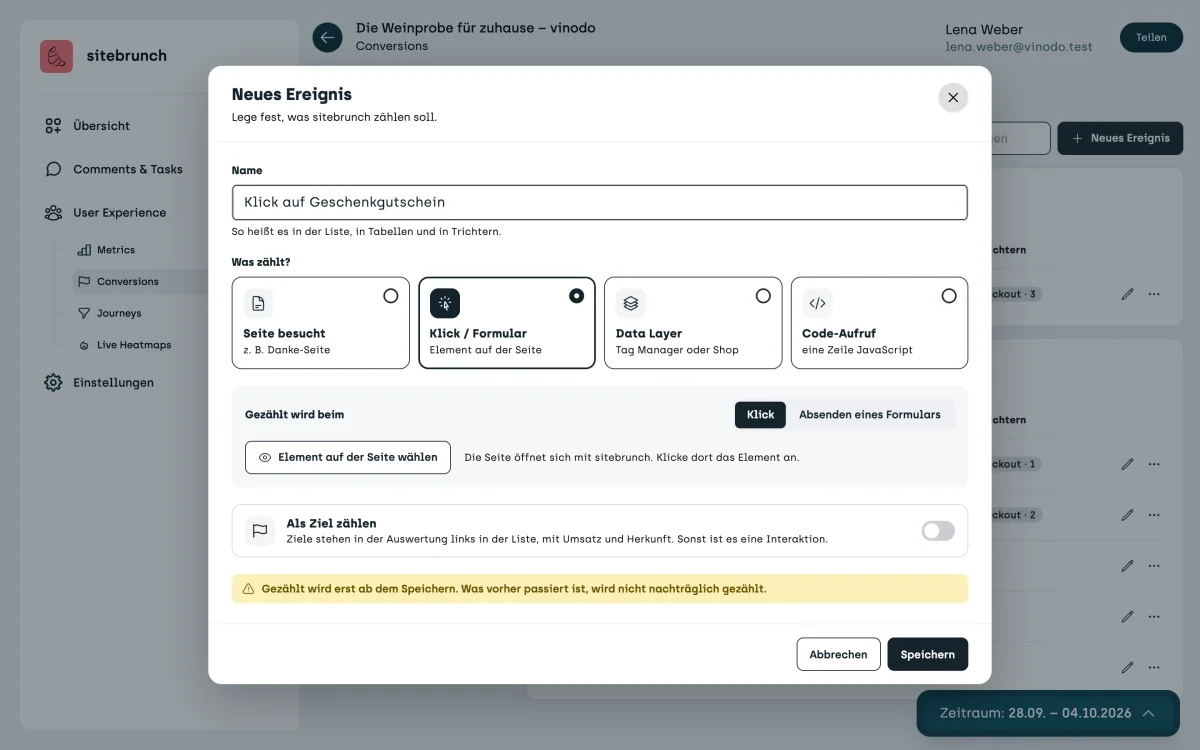
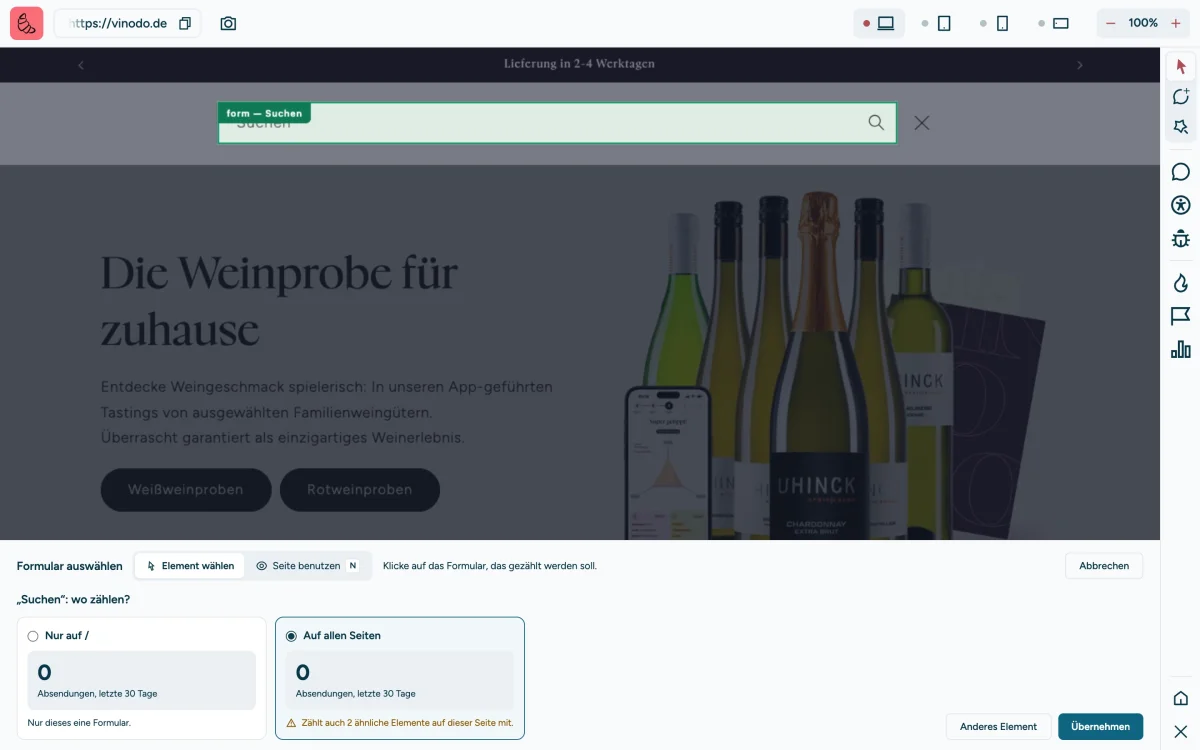
Your website opens in a new tab with sitebrunch. At the bottom you see the bar “Pick an element”. When you move the mouse over the page, sitebrunch outlines the element underneath in green. Click the element that should be counted.
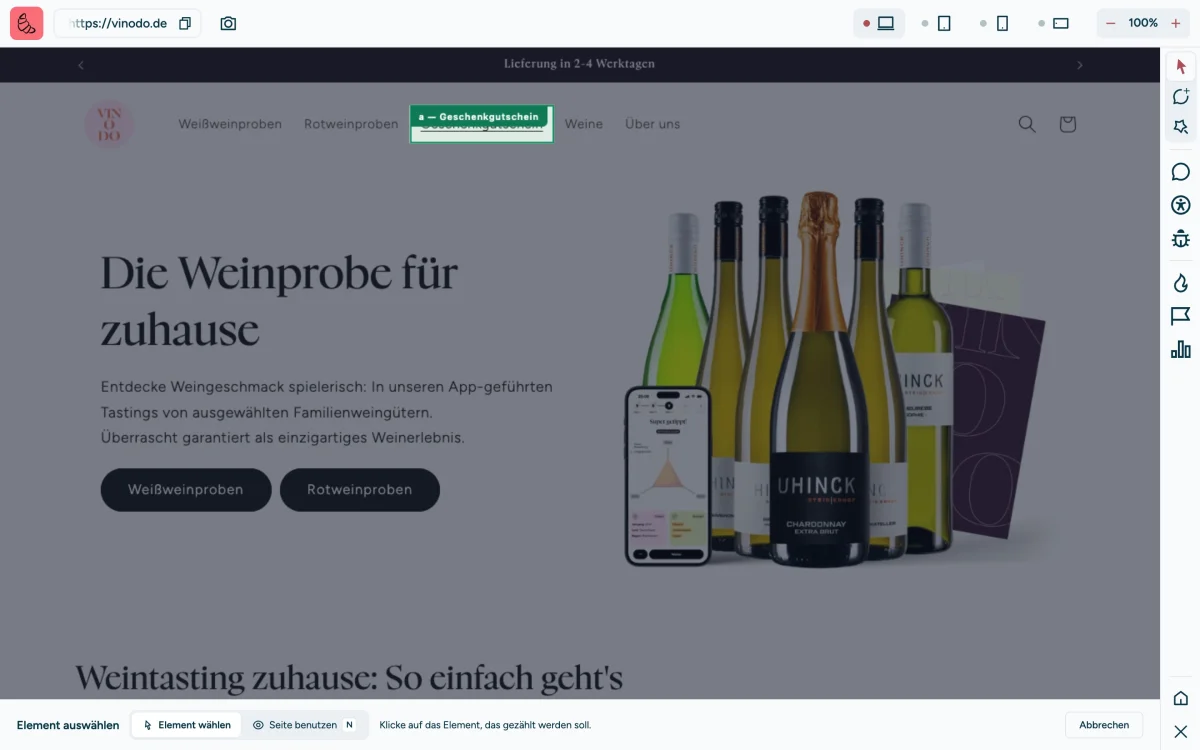
After the click, sitebrunch asks you where the element should count:
“Only on /”: only this one element on exactly this page counts.
“On all pages”: it counts on every page where the element appears. This fits menus, headers and footers.
Below both options you see how often the element was clicked in the last 30 days. This lets you check that you caught the right element. If it doesn't fit, click “Pick another element”. Otherwise click “Use this element”.
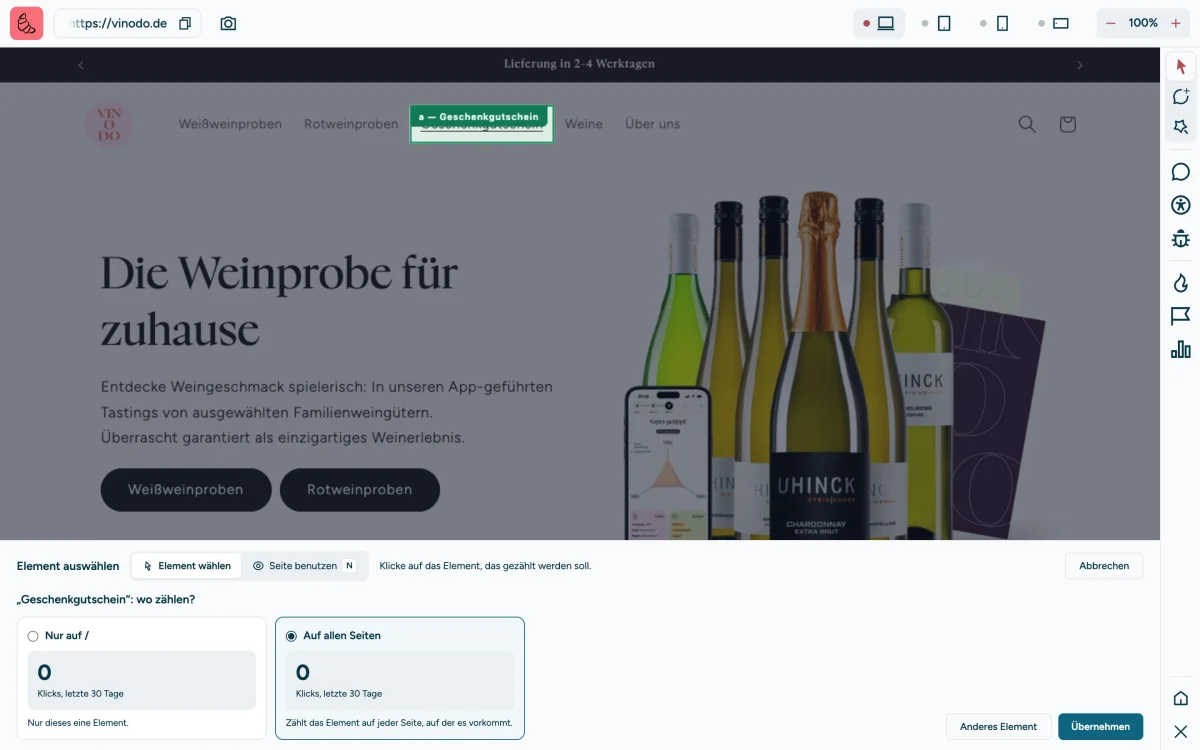
The tab closes and you are back in the “New event” window. The element now appears under “Counted on”, with a note about where it counts. With “Pick another element on the page” you add more elements, for example the same button in a second place. Use the trash can to remove one.
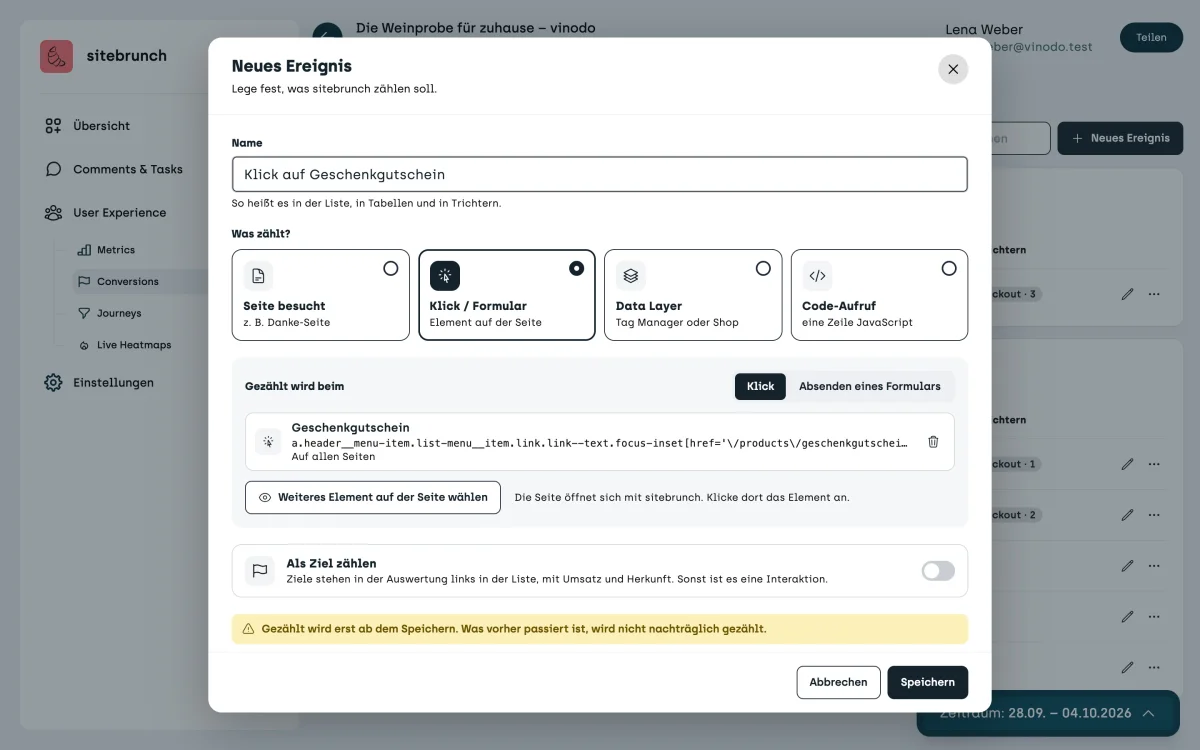
Example on vinodo.de: “Click on gift voucher” counts on all pages how often someone clicks the gift voucher in the menu.
For a form, choose “Form submit” at the top. The bar is then called “Pick a form”, and sitebrunch only outlines whole forms. It only counts once someone submits the form, not when they click into it.
Example on vinodo.de: “Search used” counts every submitted search. To pick it, first open the search field via “Use page” and the magnifying glass at the top right.
Data layer
Use this kind when your shop or your tag manager already reports the event. Most shop systems, for example, report view_item, add_to_cart and purchase on their own.
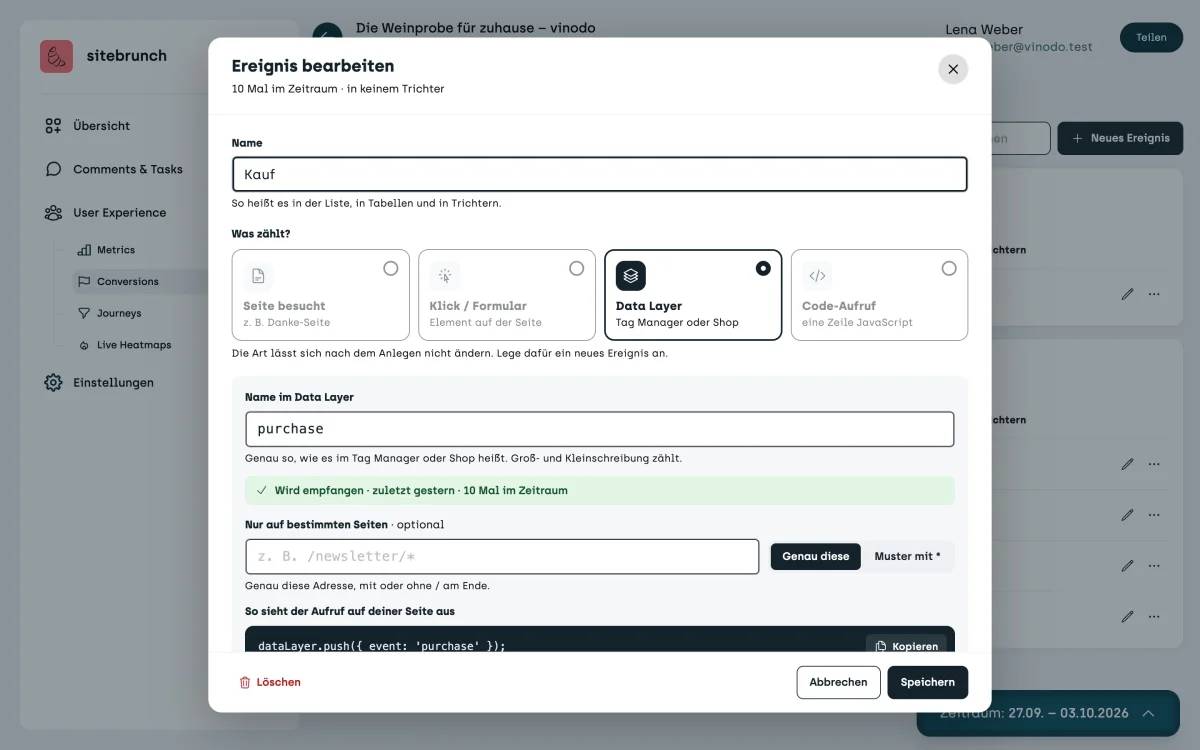
Under “Name in the data layer”, enter the name exactly as it is called in the shop. Upper and lower case matter. If the event carries an amount, sitebrunch reads it automatically.
Example on vinodo.de: “Product viewed” counts the event view_item, which the shop reports on every product page. This is what the call looks like:
dataLayer.push({ event: 'view_item' });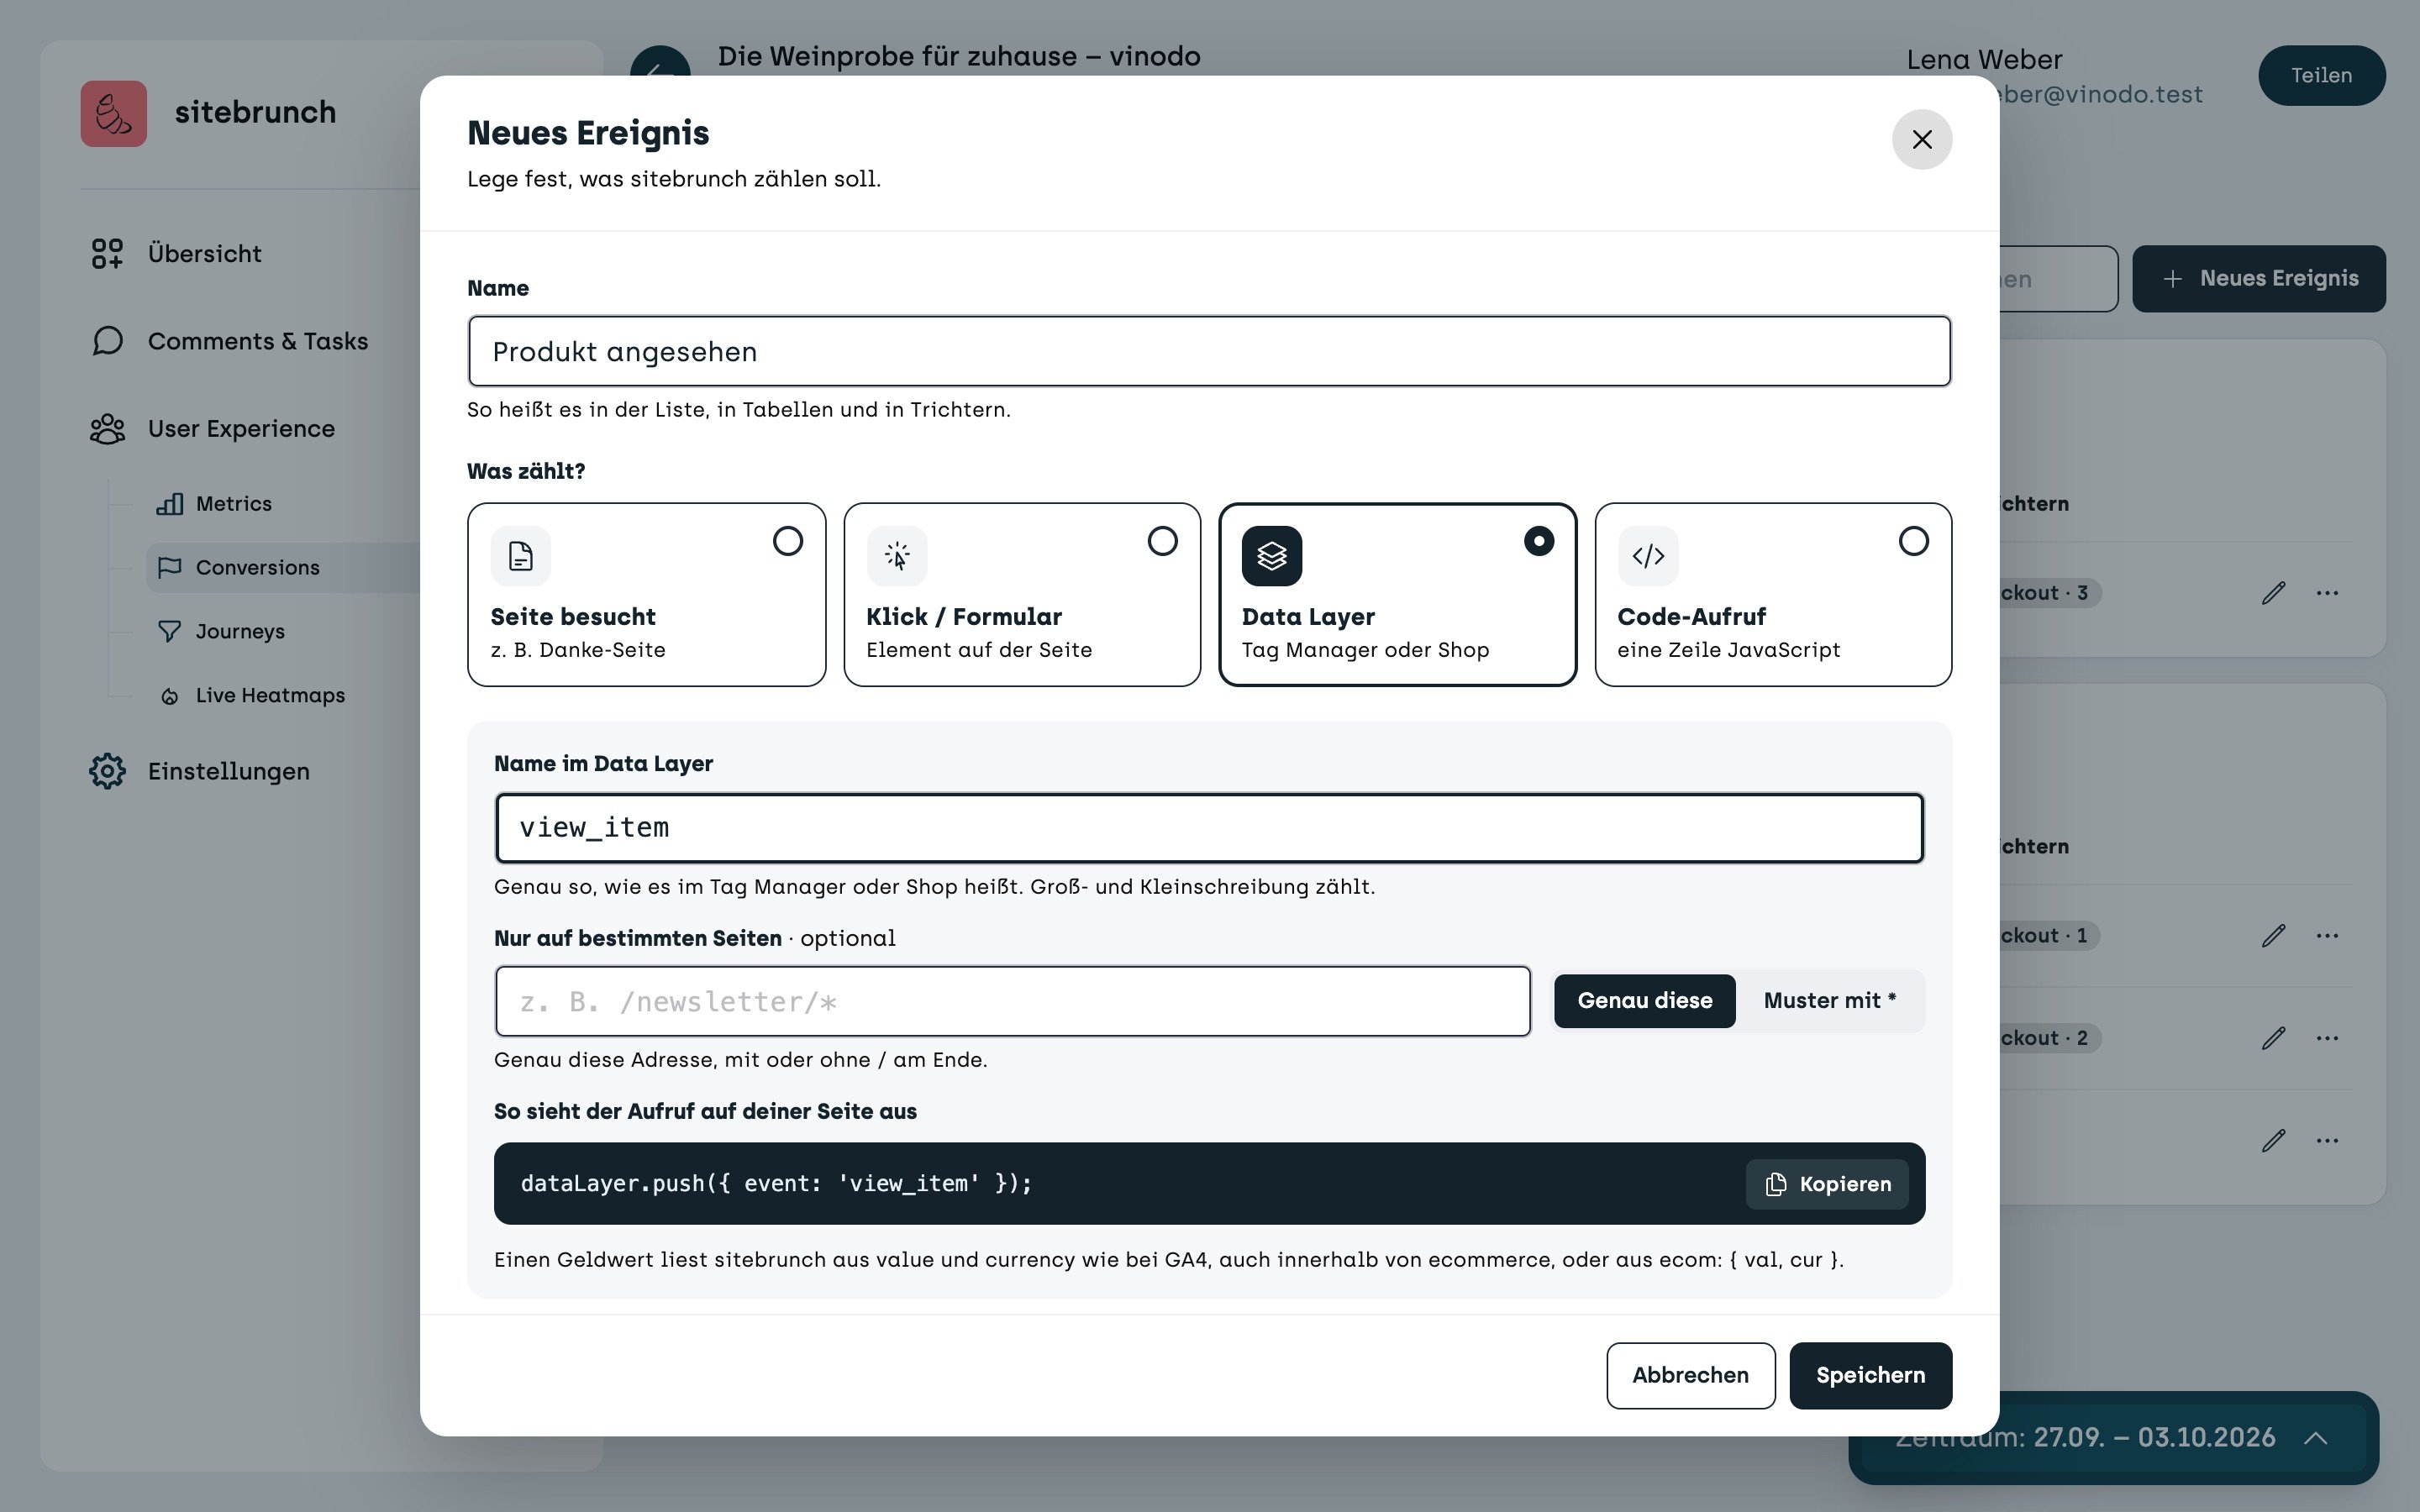
Code call
Use this kind when the event has no page of its own and your shop doesn't report it. You or your developers then add one line of JavaScript in the right place, for example after a successful sign-up.
The code name can't be changed after the event is created, because otherwise the code on your site would no longer match.
Example on vinodo.de: “Newsletter sign-up” with the code name newsletter_signup. The line for it is:
window.sitebrunch.event('newsletter_signup');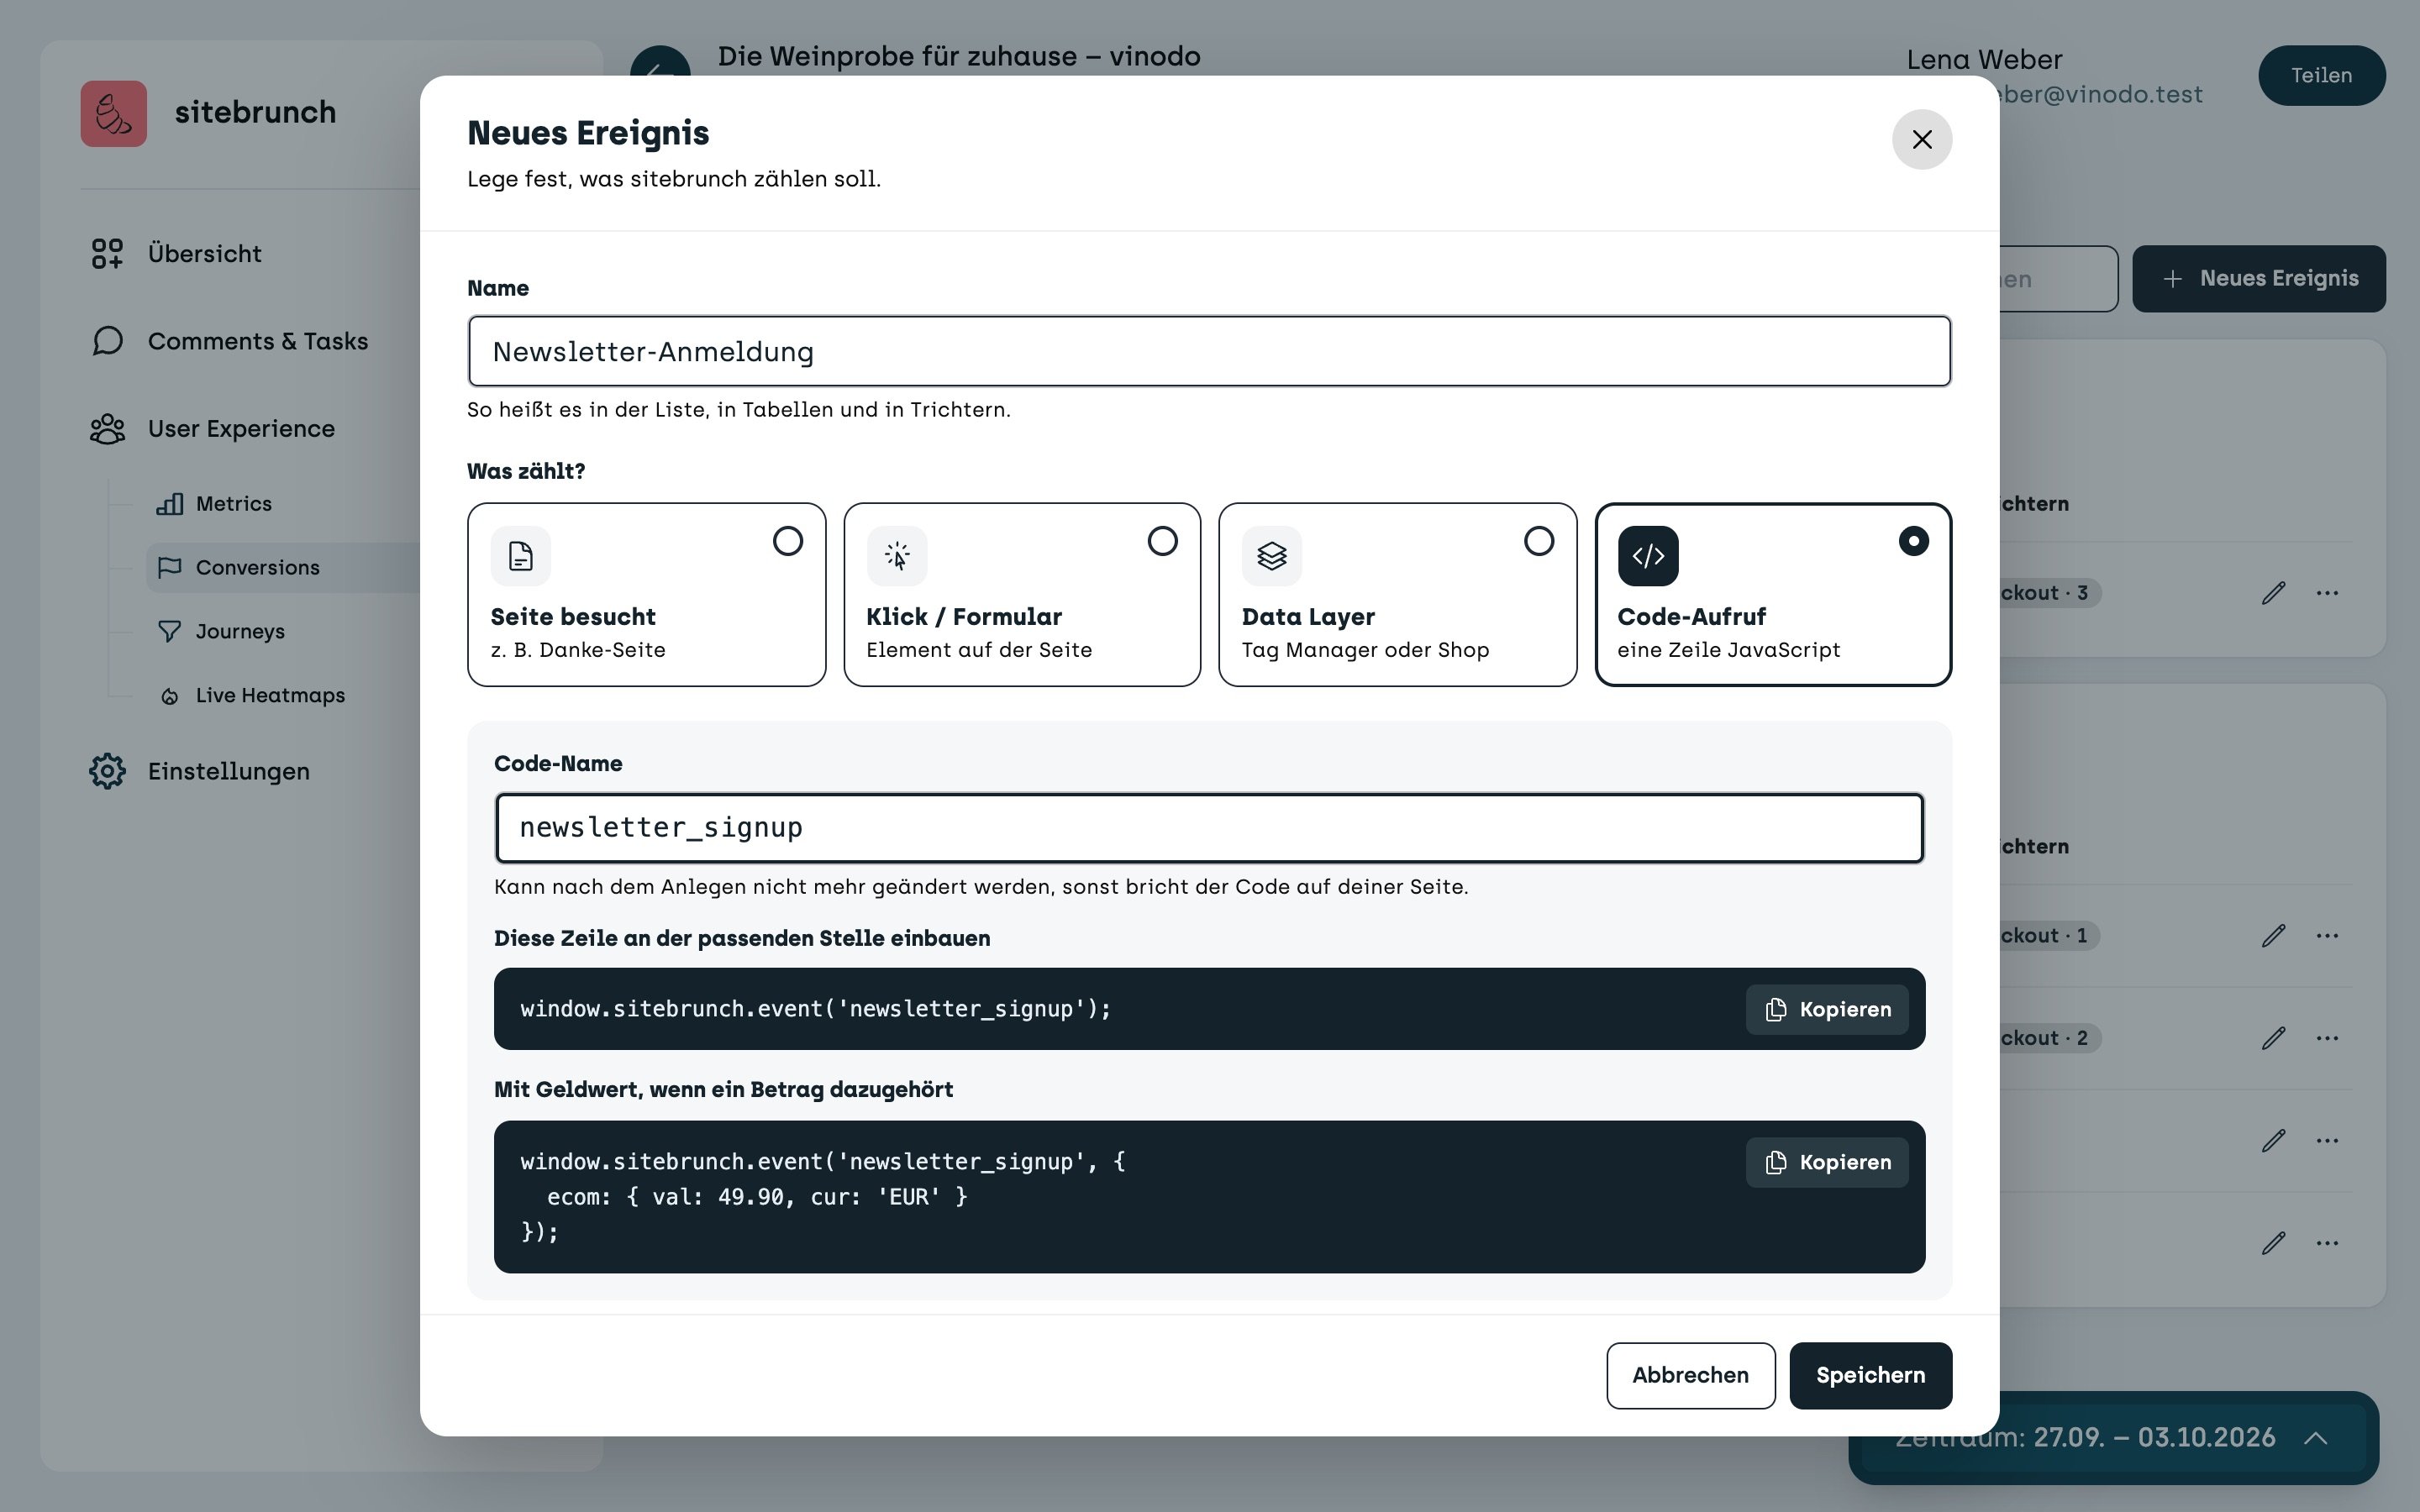
Count as goal and save
Turn on “Count as goal” if the event is a goal. Otherwise it stays an interaction. Then click “Save”.
Rename an event
Many shops report events with English technical names like purchase or add_to_cart. To make them clear to your team at a glance, give them a name of your own. Click the pencil next to the event and change the name, for example to “Purchase”.
In the same window you see whether the event is arriving. If it says “Receiving”, everything is set up correctly.