A route connects a start with a goal. It shows you how many visits make it to the goal and via which pages that works best.
Last updated: October 3, 2026
Requirements
You have created at least one goal, for example “Purchase”.
Create a route
Switch to the “Route” view at the top and click “Add route” on the left. First choose the start: a source, a campaign, a page or a section. Click “Choose” next to the entry you want.
Then choose where the route ends. Your goals are at the very top, sorted by visits with a conversion. But you can also choose a page or a section as the end.
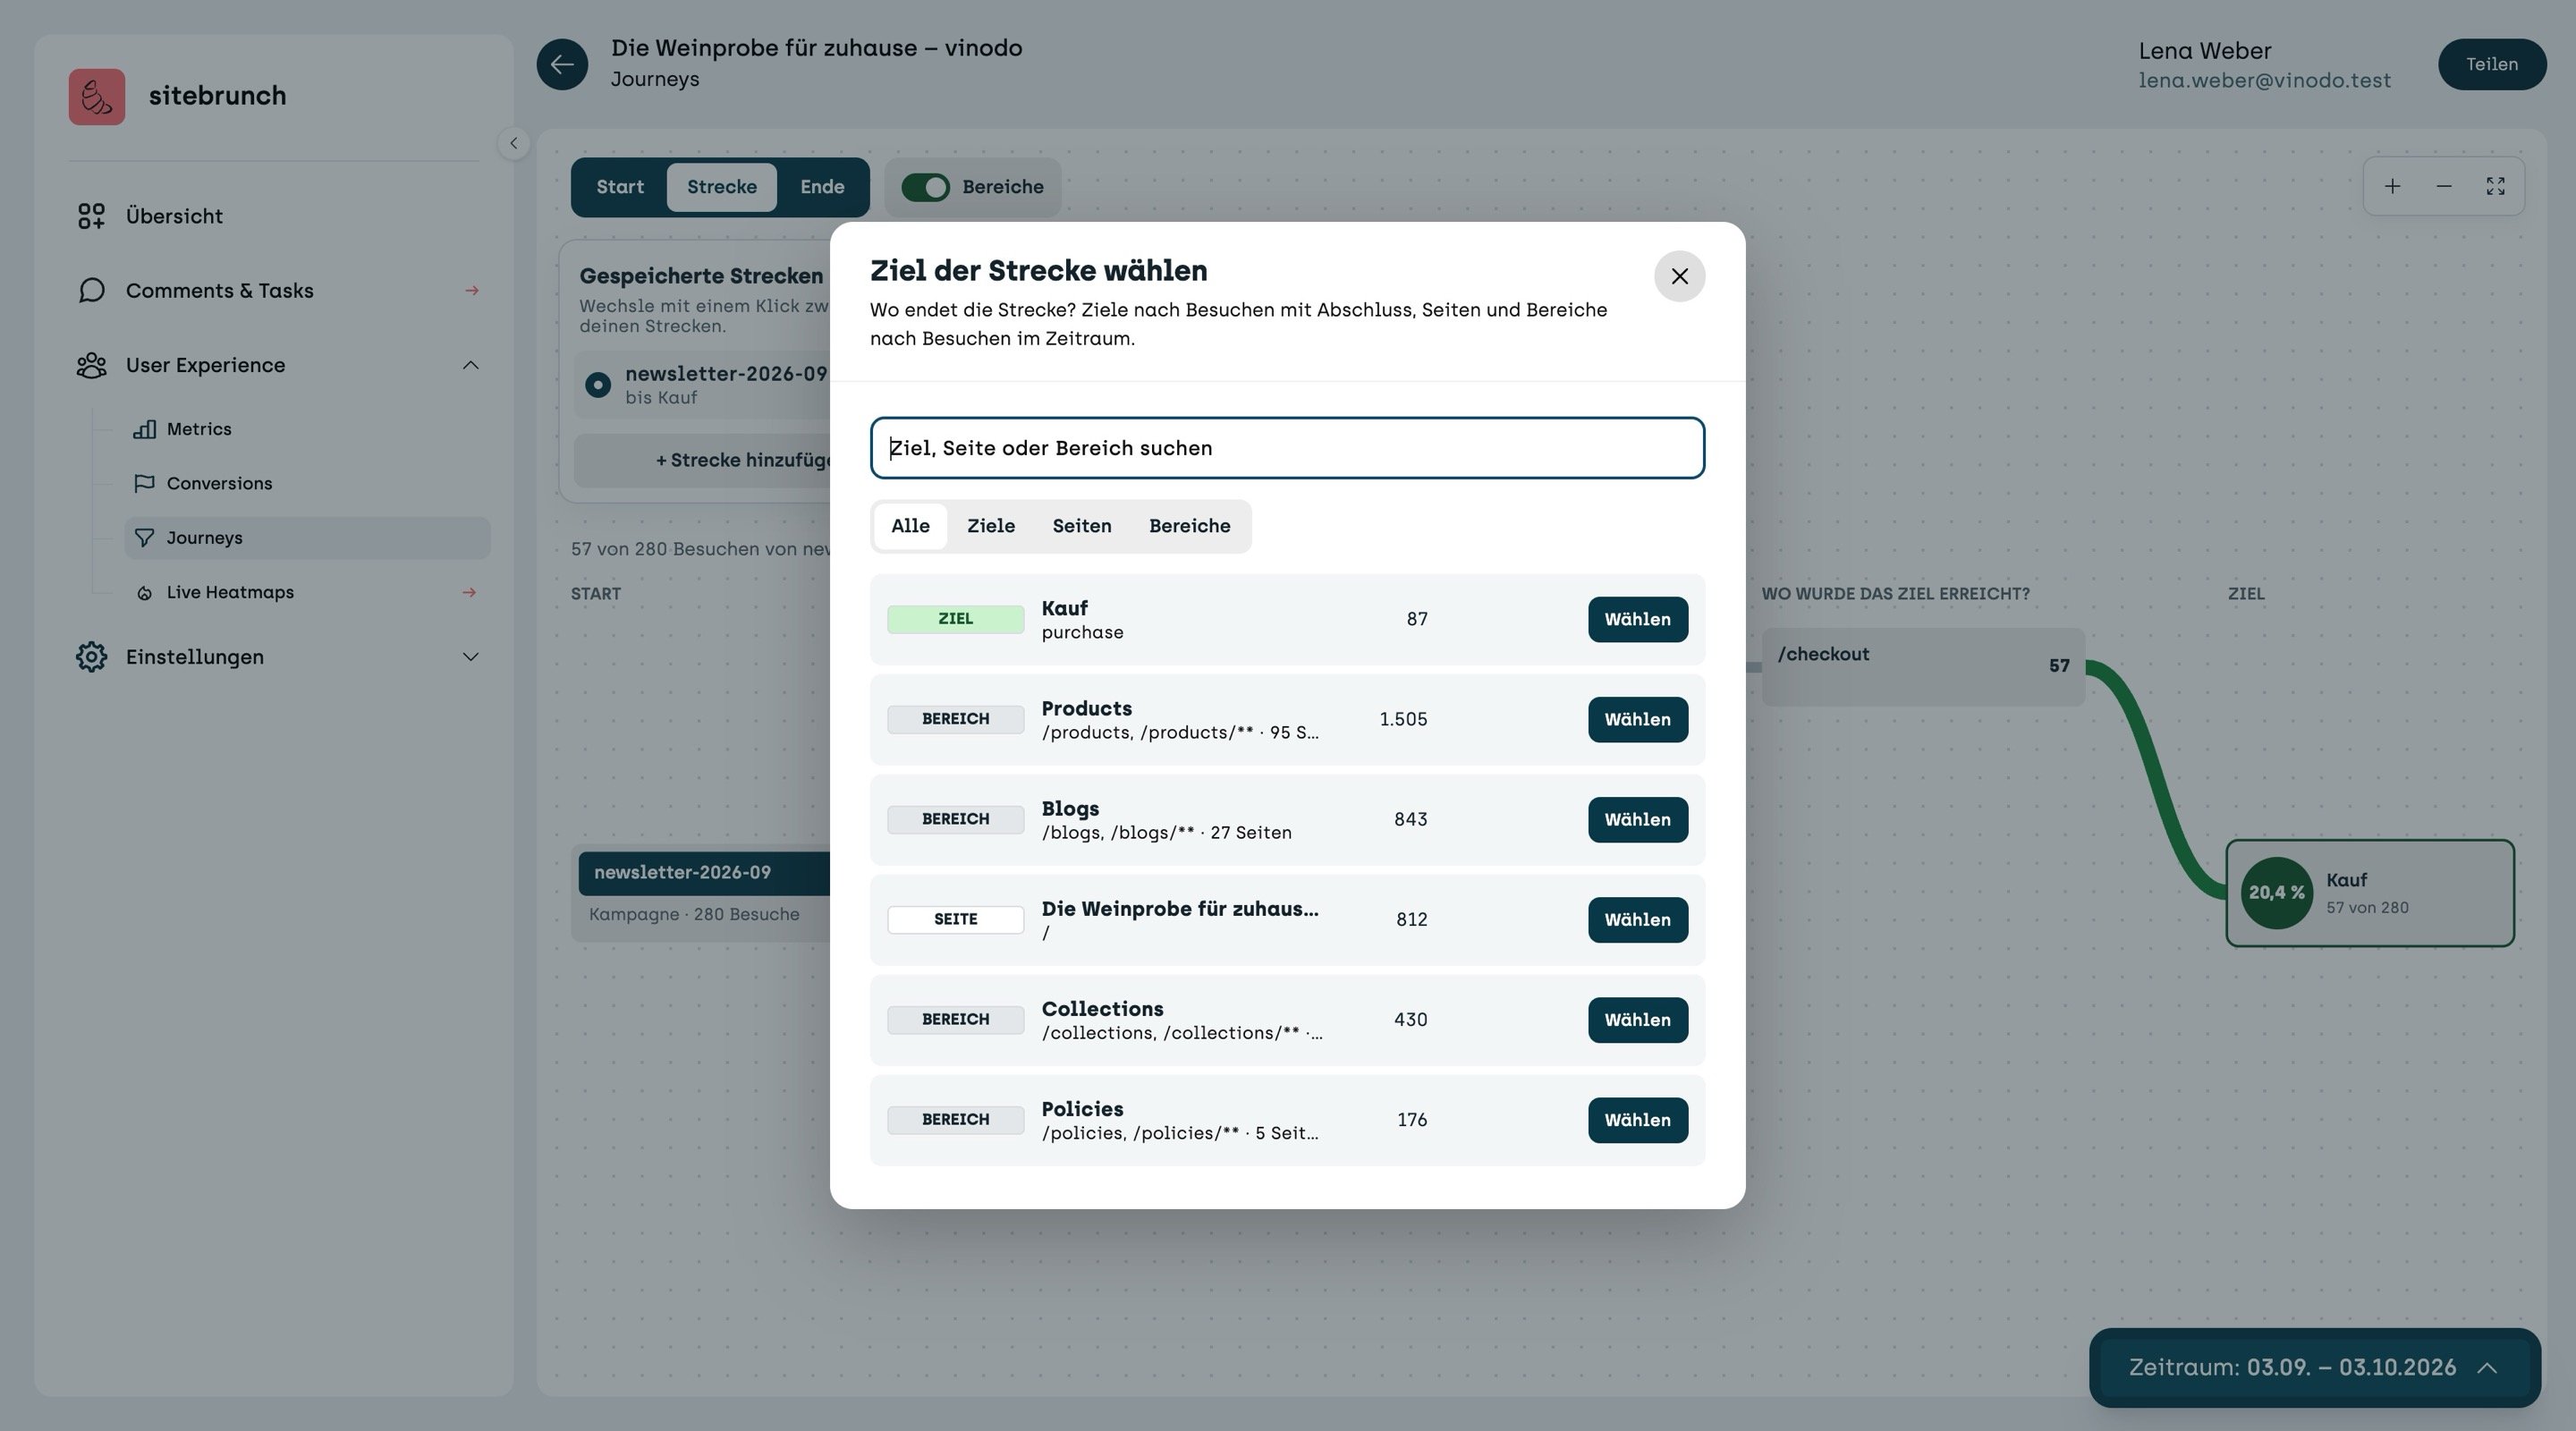
The route is saved right away and appears on the left under “Saved routes”, for example “newsletter-2026-09 to Purchase”.
Read the route
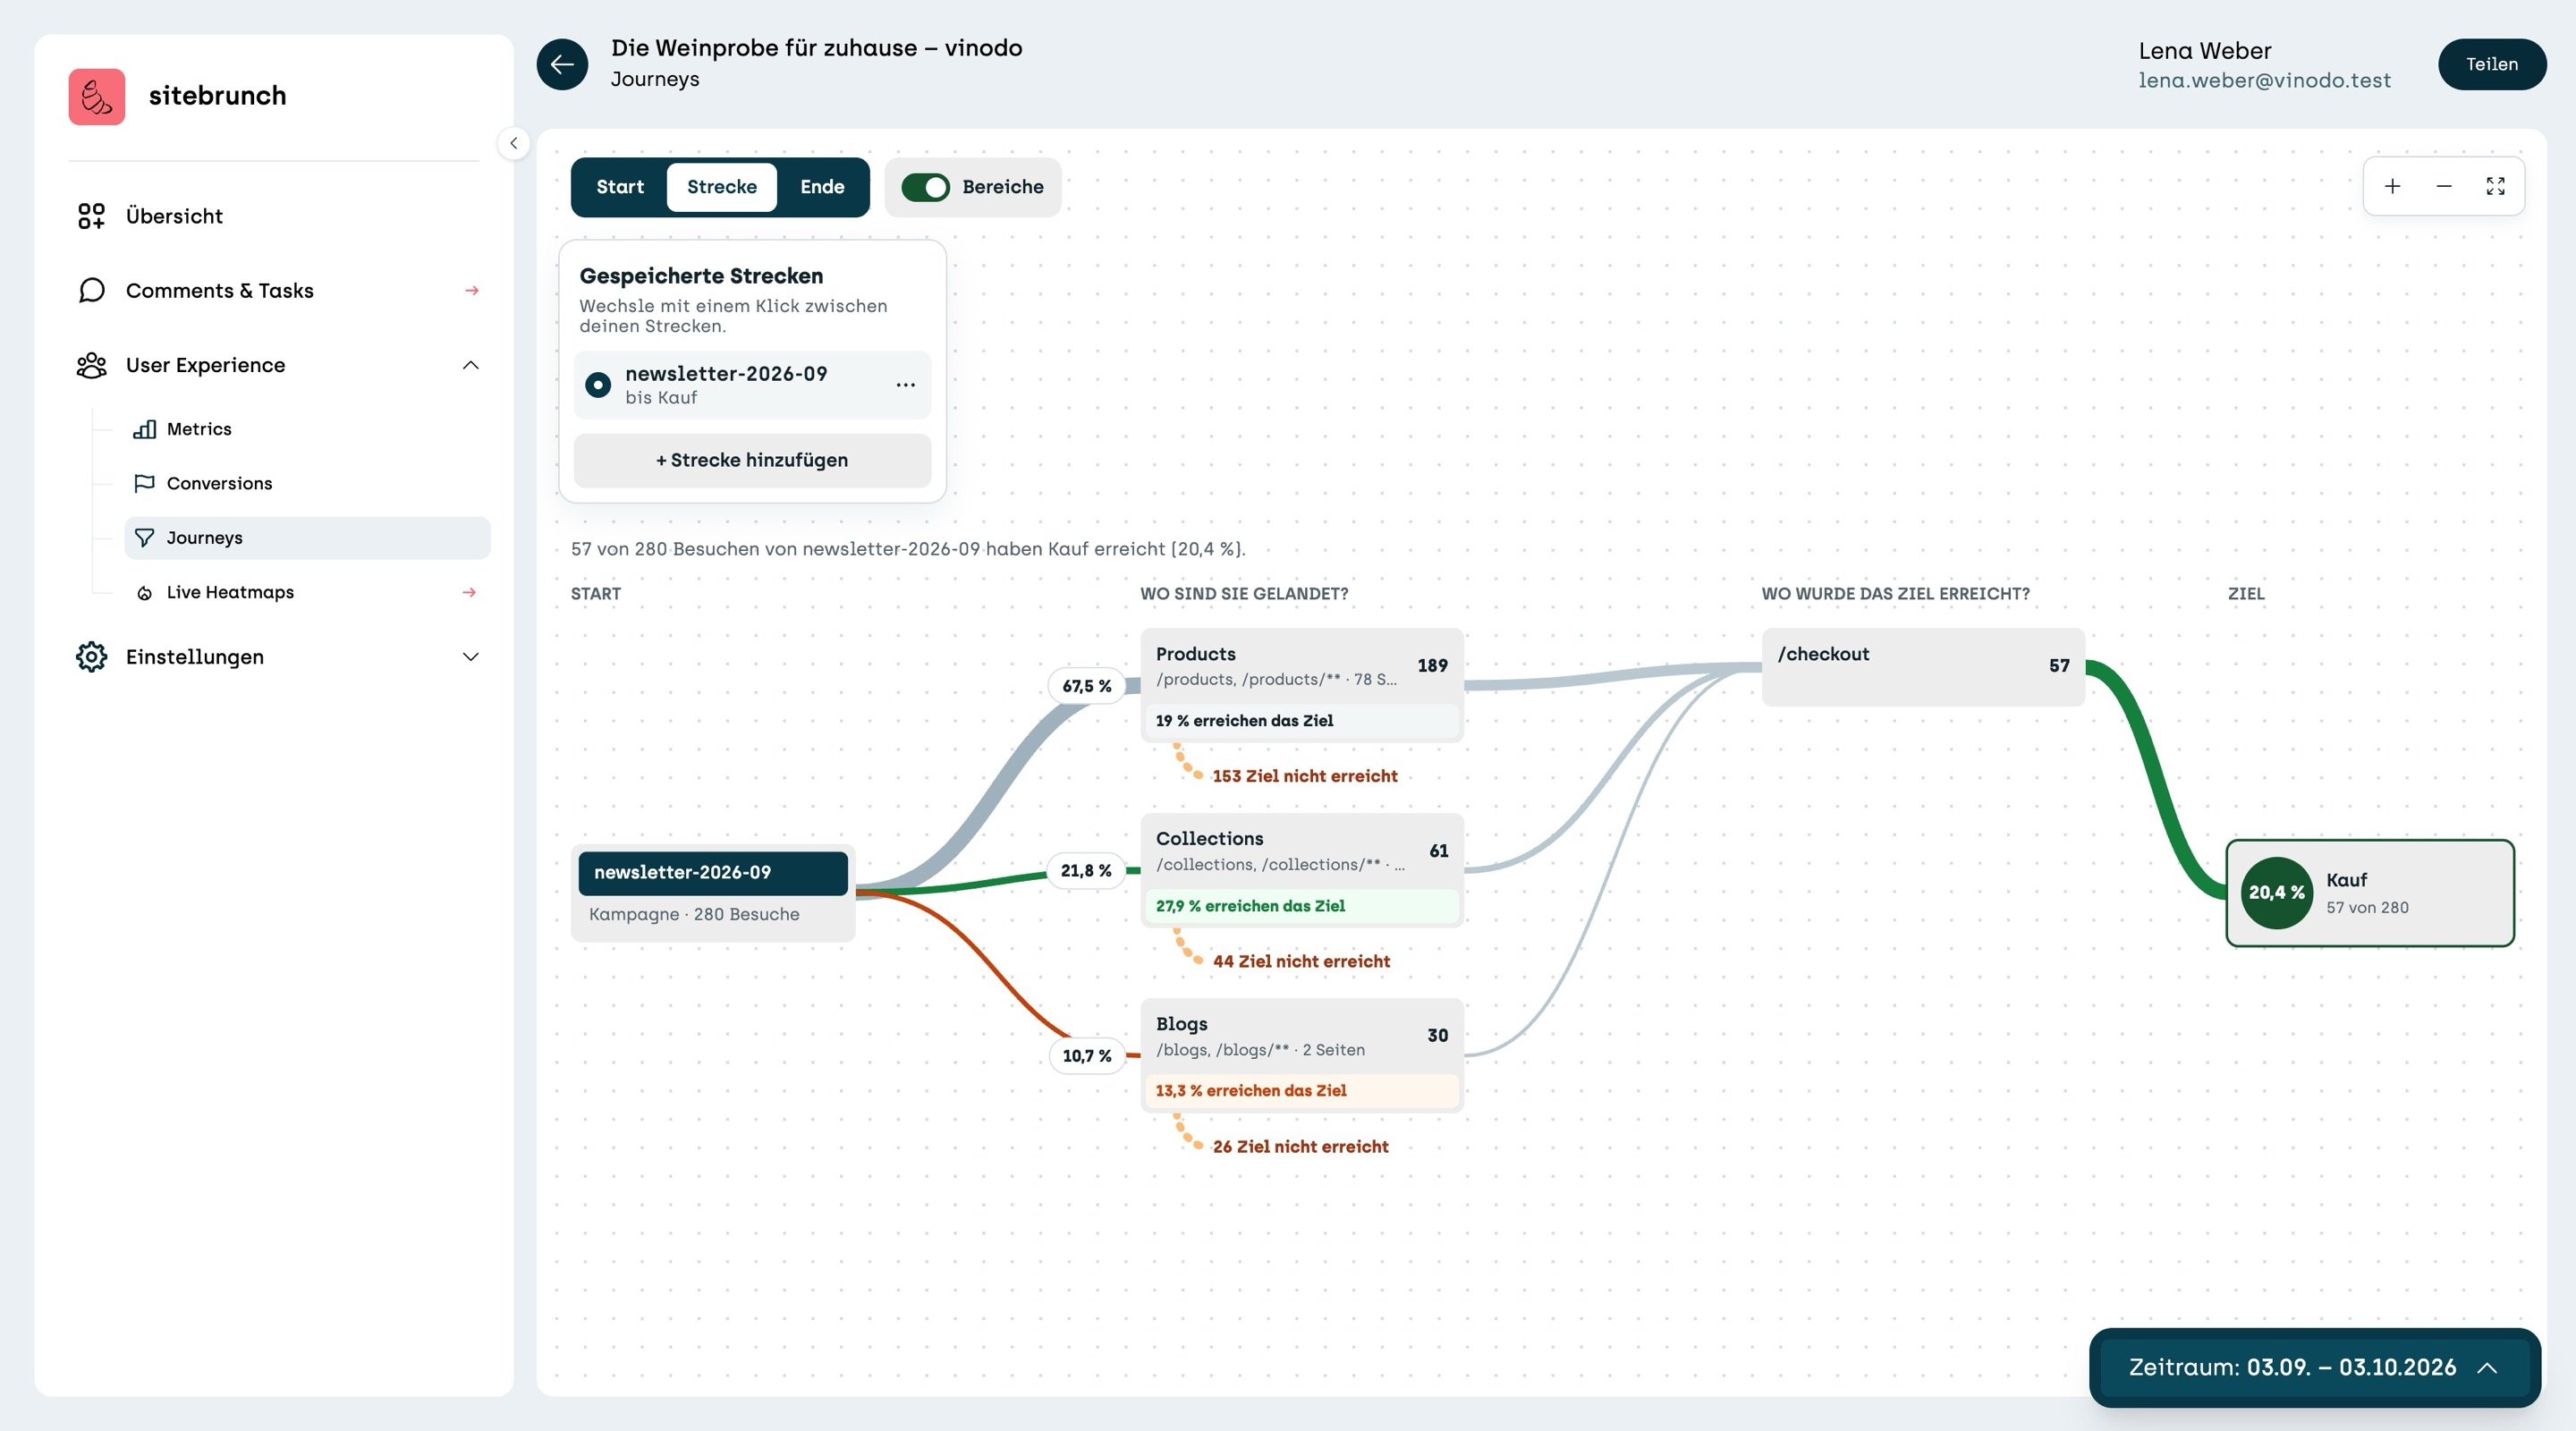
At the top, one sentence sums up the route. On vinodo.de: “57 of 280 visits from newsletter-2026-09 reached Purchase (20.4%).”
Below each card in “Where did they land?” you see what percentage of the visits from there reach the goal. Green is the best page, red the weakest. Below that, in orange, you see how many did not reach the goal.
The column “Where was the goal reached?” shows the page on which the goal happened. For a purchase, this is usually the checkout.
As in “Start”, click a card or “Follow on” to see which page came next. To remove a route, use the three dots next to it.