
Check your website for accessibility manually
Last updated: June 2, 2026
Requirements:
You have an account and can log in.
You have at least the Solo plan.
You have created a project for your website.
Different audits
With sitebrunch Accessibility you can create two different types of audits.
Kick-off audit
The kick-off audit is a shortened audit that checks for the most common accessibility violations. It is a good fit if you:
…want an overview of the general accessibility of your website.
…want to work your way into digital accessibility step by step.
…want to give your client a rough overview of where their accessibility stands.
Complete audit
A complete audit checks your website against the requirements of EN 301 549, the European standard for accessible websites and applications. It is a good fit if you:
…want to check your website for the German Accessibility Strengthening Act (BFSG), the German Disability Equality Act (BGG) or the BITV.
…want to make sure your website meets the European standard.
Create an audit
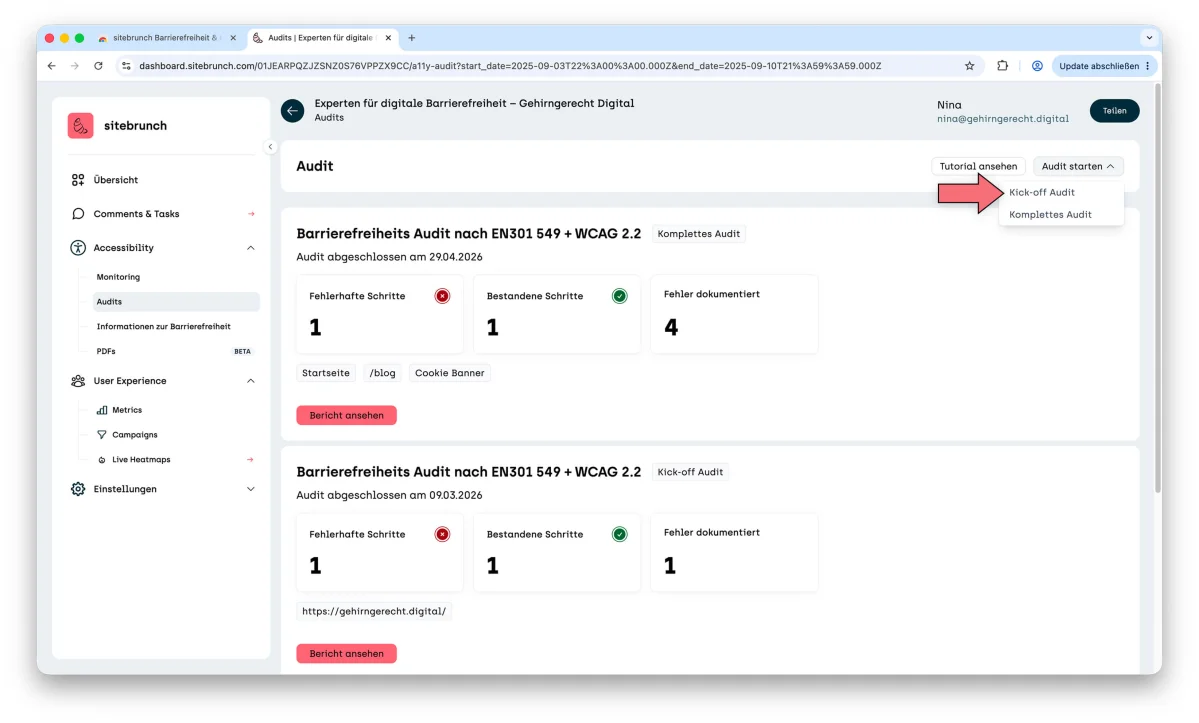
First open your project by clicking the project card in the workspace. You will find the audit overview in the navigation under “Accessibility”, “Audits”.
The overview shows every audit you have ever run for the website. To create a new audit, open “Start audit” and choose either “Kick-off Audit” for a shortened audit or “Complete Audit” for an audit against EN 301 549. The two audits differ only in the number of testing steps.
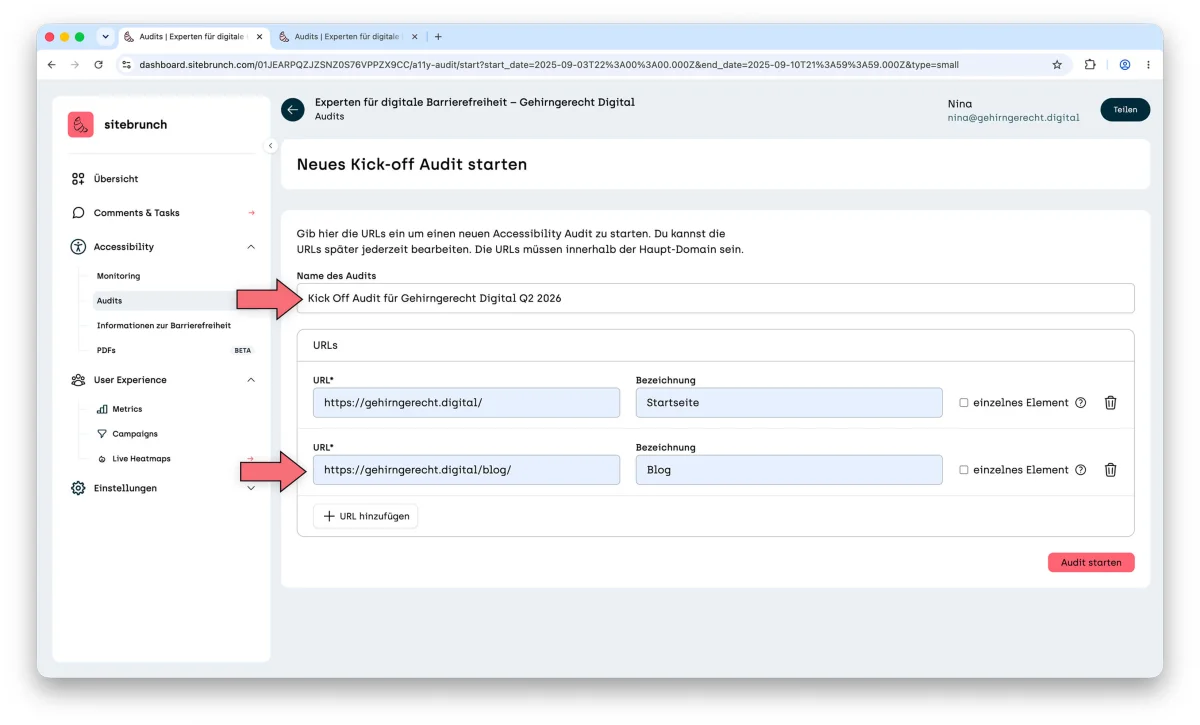
In the next step you can set the name of the audit and enter the pages to be checked in the audit. To do this, enter the URLs of your pages, for example “https://gehirngerecht.digital” for the homepage or “https://gehirngerecht.digital/blog” for the blog page.
For each page you can also enter a name, for example “Homepage” or “Blog”. This helps you and your clients tell the pages apart during the audit and in the audit report.
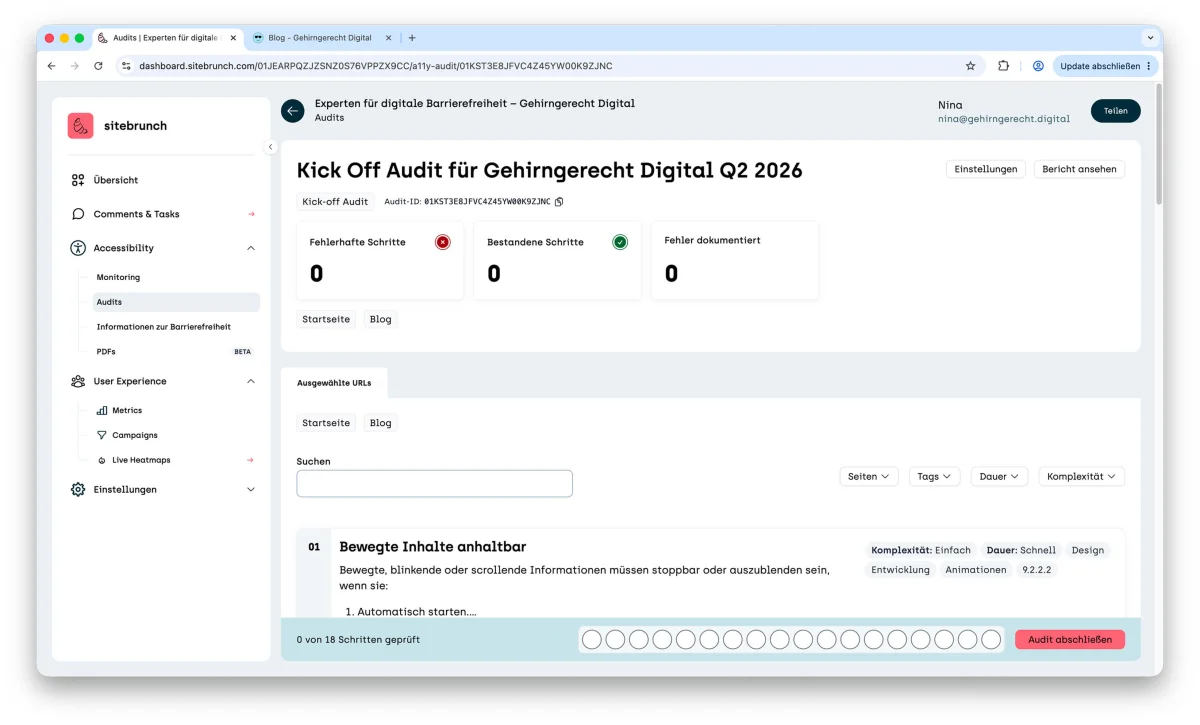
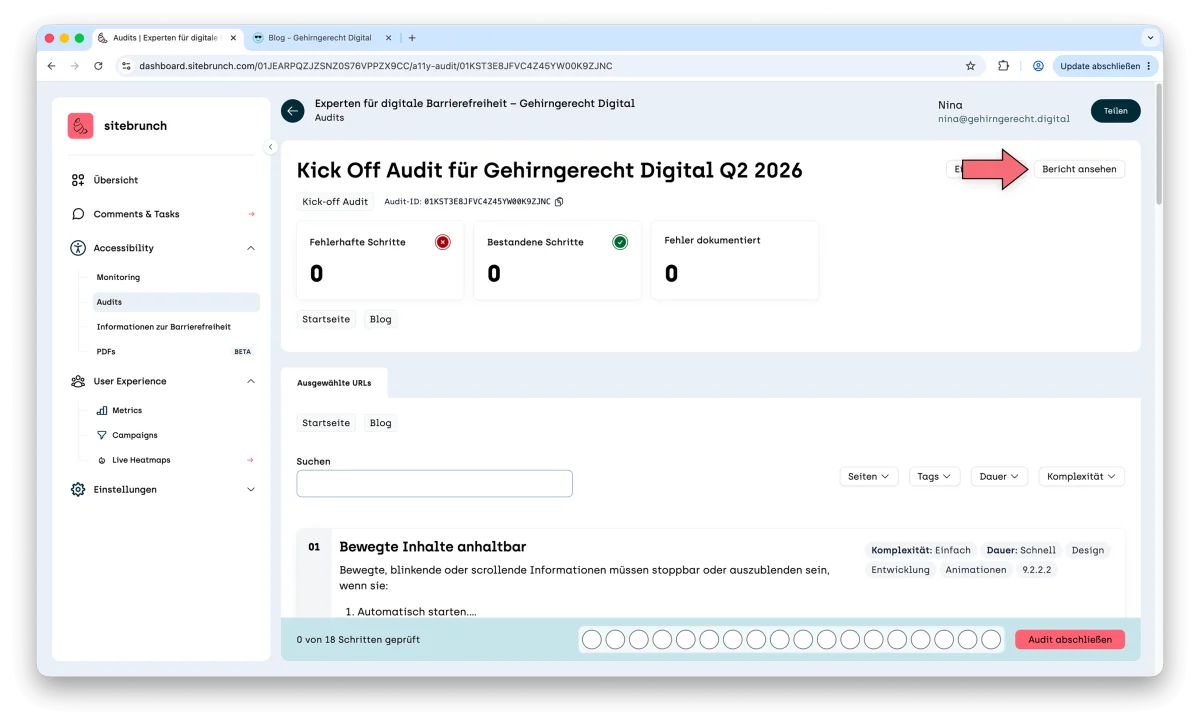
When you click the “Save” button, the audit is created and you are taken to the audit view. At the top you see an overview of the testing steps. This is where you will later start every testing step.
Test single elements
Optionally, you can test content as a “Single element”. This changes how the audit guides you:
Without single elements (default setting): You go through all pages one testing step at a time. Example: You first check the testing step “Choose a meaningful page title” on all pages, then “Focus status visible” on all pages, and so on.
With single elements: You select a single element (for example a cookie banner) and go through all testing steps one after the other for this element.
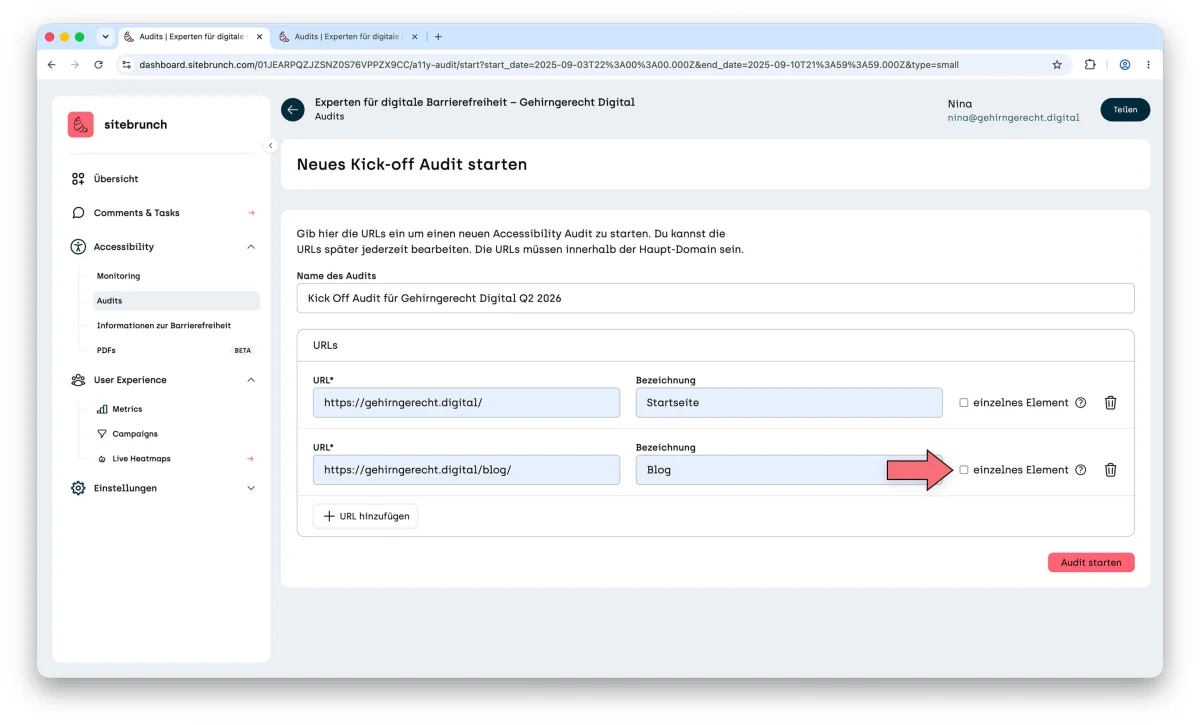
To get started, we recommend that you begin without “Single element”. Use “Single element” mainly when you want to check a particularly complex component separately and very thoroughly.
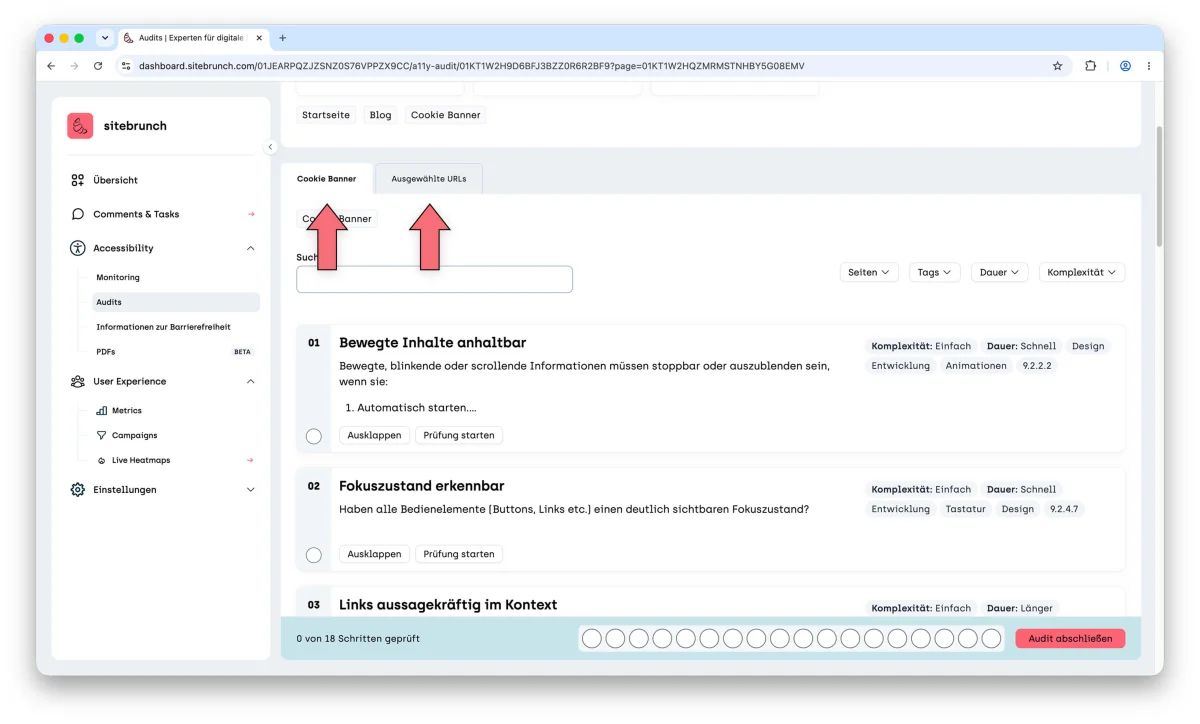
Changes to the audit
You can edit the audit later using the “Settings” button. There you can change the title of the audit and the pages to be checked.
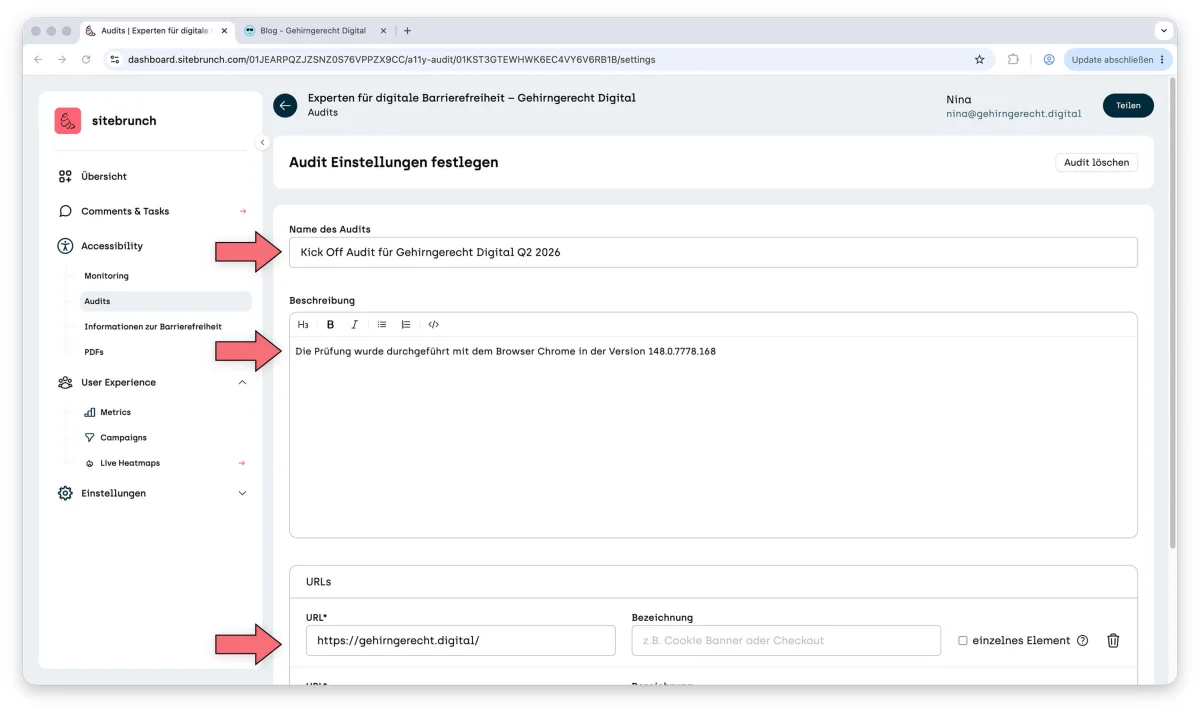
You can also add a description that is included in the audit report. For example, if you want to note which browser, which browser version and which assistive technology (such as a screen reader) you tested with, this is a good place for it.
Run the audit
This is how you run the audit:
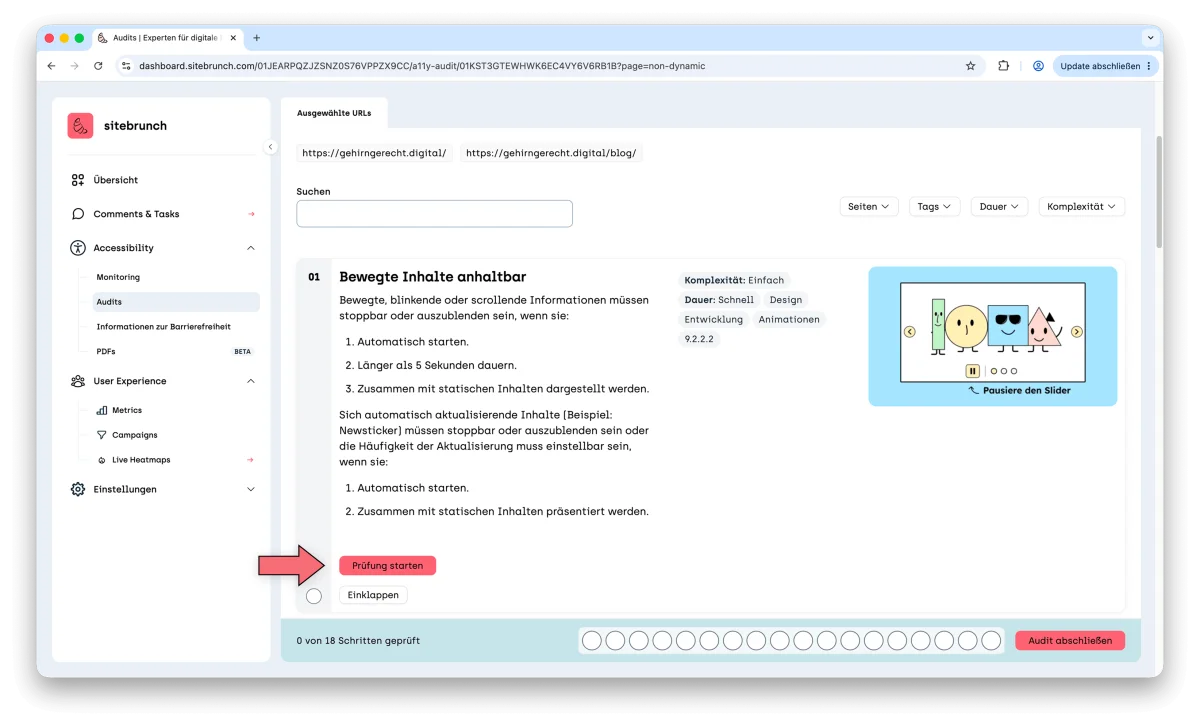
In your audit, scroll to the list of testing steps.
Select the first testing step, for example “01 Persistent moving content”.
Click the “Start testing step” button.
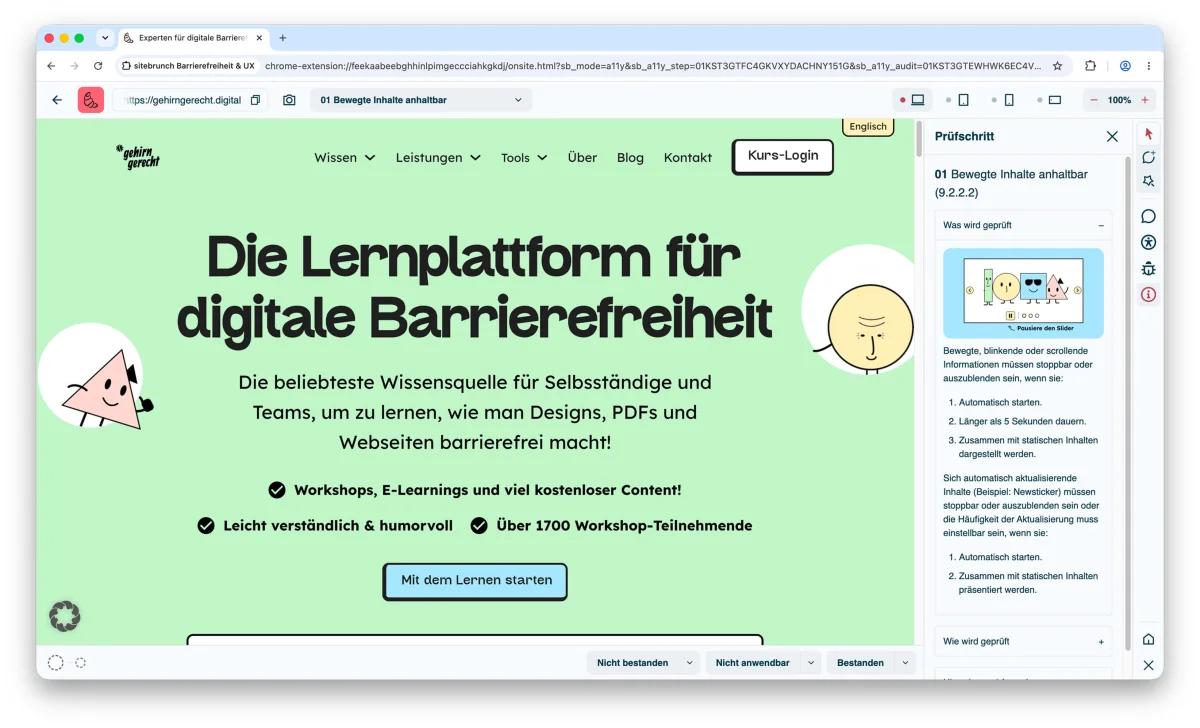
The testing tool opens. Every testing step has the same structure: You get information on what is checked, how it can be checked and which notes and exceptions to keep in mind.
If you want to know in detail how to document and rate a single testing step, read on in Complete a testing step.
Create the audit report
You can view the audit report at any time in the audit. To do this, click the “View report” link in the testing step overview.
The audit report is a web page (HTML document) that sitebrunch Accessibility creates automatically while you audit. You can filter the report directly in the browser, for example by severity or status, and work through the open items more easily than in a static PDF or Word document.